I- Giới thiệu:
Netflow là tính năng của Cisco IOS cho phép thống kê lưu lượng gói qua router. Netflow thực hiện giám sát, phân tích, tính toán lưu lượng gói. Sử dụng phổ biến trong các yêu cầu sau:
• Giám sát mạng : Cho phép giám sát hiện trạng mạng gần như thời gian thực. Giám sát mạng là kỹ thuật dựa vào flow (tập những gói có cùng 7 thông tin : IP nguồn, IP đích, Port nguồn, Port đích, ToS, loại giao thức lớp 3, cổng vào) nhằm thực hiện thu thập thông tin theo lưu lượng gói, theo luồng liên quan đến một thiết bị router, switch hoặc sự kết hợp của nhiều lưu lượng từ nhiều thiết bị giúp chủ động nhận diện được vấn đề, hiệu quả trong quá trình xử lý sự cố và đưa ra giải pháp giải quyết vấn đề một cách nhanh chóng.
• Giám sát ứng dụng : Cho phép người quản trị nhìn thấy một cách chi tiết về hoạt động của ứng dụng trên mạng theo thời gian. Thông tin này được dung để hiểu được những dịch vụ mới nhằm phân phối tài nguyên mạng (băng thông, chất lượng dịch vụ…) và tài nguyên cho ứng dụng cũng như là kế hoạch mở rộng.
• Giám sát người dung: Cho phép người vận hành mạng hiểu rõ tài nguyên mạng và tài nguyên ứng dụng mà người dung sử dụng từ đó có kế hoạch phân phối tài nguyên một cách hợp lý cho người dung, cũng như nhận diện được những vấn đề liên quan đến an ninh mạng hoặc vi phạm chính sách.
• Xây dựng kế hoạch phát triển mạng : Do có khả năng giám sát và phân tích lưu lượng dữ liệu trong một khoảng thời gian dài, điều này cho phép người quản trị có cơ hội theo dõi, dự đoán sự phát triển của mạng để có kế hoạch nâng cấp như tăng số lượng router, những cổng với băng thông lớn…
• Phân tích an ninh mạng : Netflow định danh và phân loại những loại tấn công như Dos, DDos, virus, worm theo thời gian thực dựa vào những sự hành vi thay đổi bất thường trong mạng.
• Tính toán lưu lượng: Netfow cho phép người quản trị có được thông tin chi tiết lưu lượng dữ liệu như địa chỉ IP, ứng dụng, ToS (type of service), số lượng gói, số lượng byte, thời gian hoạt động giúp cho việc tính toán tài nguyên mạng được sử dụng theo người dung, ứng dụng… trong khoảng thời gian cụ thể.
Lưu lượng qua router hoặc switch khi thu thập và phân tích sẽ được đặt trong cache (Netflow cache), có thể truy xuất thông qua CLI hoặc ứng dụng bên ngoài.
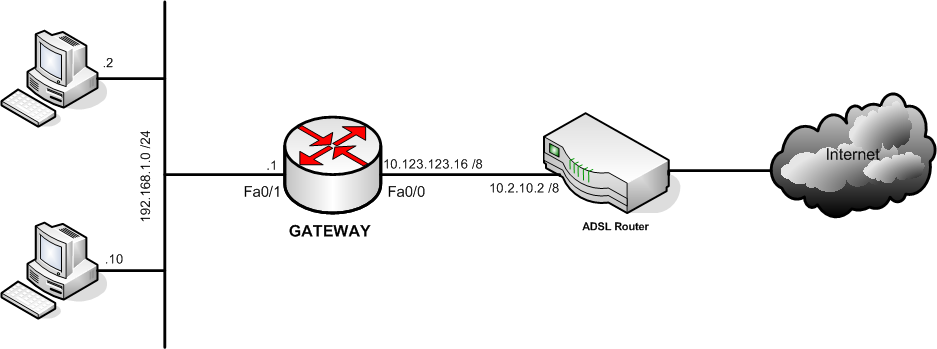
II- Mục đích và sơ đồ kết nối
Trong bài lab này yêu cầu cấu hình Netflow trên router GATEWAY và kiểm tra kết quả Netflow cache qua CLI hoặc ứng dụng phân tích Netflow được cài đặt trên thiết bị giám sát.
III – Cấu hình chi tiết :
Bước 1 : Đặt tên và địa chỉ của các interface
Router(config) #hostname GATEWAY
GATEWAY(config) #interface FastEthernet0/0
GATEWAY(config-if) # ip address 10.123.123.16 255.0.0.0
GATEWAY(config-if) #no shutdown
GATEWAY(config) #interface FastEthernet0/1
GATEWAY(config-if) # ip address 192.168.1.1 255.255.255.0
GATEWAY(config-if) #no shutdown
Bước 2 : Cấu hình PAT và default route để mạng bên trong truy cập được Internet
GATEWAY(config-if) # access-list 1 permit 192.168.1.0 0.0.0.255
GATEWAY(config-if) # ip nat inside source list 1 interface FastEthernet0/0 overload
GATEWAY(config) #interface FastEthernet0/1
GATEWAY(config-if) #ip nat inside
GATEWAY(config) #interface FastEthernet0/0
GATEWAY(config-if) #ip nat outside
GATEWAY(config) #ip route 0.0.0.0 0.0.0.0 10.2.10.2
Kiểm tra kết quả :
GATEWAY#show ip nat translations
Pro Inside global Inside local Outside local Outside global
tcp 10.123.123.16:2492 192.168.1.10:2492 65.55.122.231:2492 65.55.122.231:2492
tcp 10.123.123.16:2492 192.168.1.10:2492 65.55.122.233:2492 65.55.122.233:2492
tcp 10.123.123.16:2492 192.168.1.10:2492 65.55.122.234:2492 65.55.122.234:2492
tcp 10.123.123.16:2492 192.168.1.10:2492 65.55.122.235:443 65.55.122.235:443
tcp 10.123.123.16:2492 192.168.1.10:2492 65.55.122.235:2492 65.55.122.235:2492
Bước 3 : Cấu hình Netflow trên router
- Xác định thiết bị sẽ nhận flow cache (lưu ý phải bao gồm giá trị port):
GATEWAY(config) #ip flow-export destination 192.168.1.10 5000
- Xác định version của Netflow:
GATEWAY(config) # ip flow-export version 5
- Xác định cổng và hướng được theo dõi:
GATEWAY(config)#interface fa0/1
GATEWAY(config)#ip flow ingress
GATEWAY(config)#interface fa0/0
GATEWAY(config)#ip flow egress
- Bạn có thể cấu hình snmp-server để cho phép đa dạng thông tin được theo dõi :
GATEWAY(config)# snmp-server community cisco123 RO
Bước 4 : Cài đặt Netflow trên phần mềm giám sát
Trong phần này chúng ta sẽ dùng phần mềm Netflow Analyzer 8 để thực hiện giám sát
- Chuẩn bị cài đặt:
Chọn Next để tiếp tục
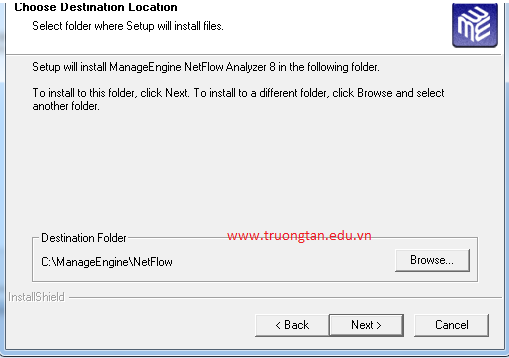
- Chọn thư mục cài đặt:
- Cấu hình web port 8080 và Netflow Port ở đây là 5000
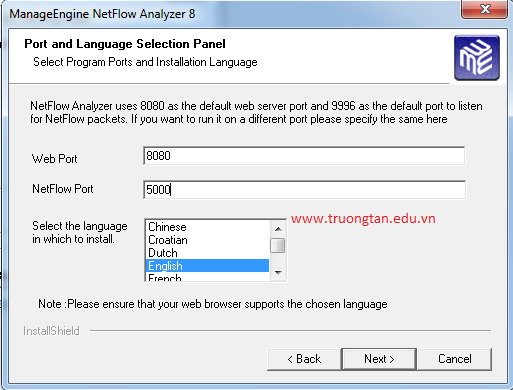
Chọn Next -> Finish
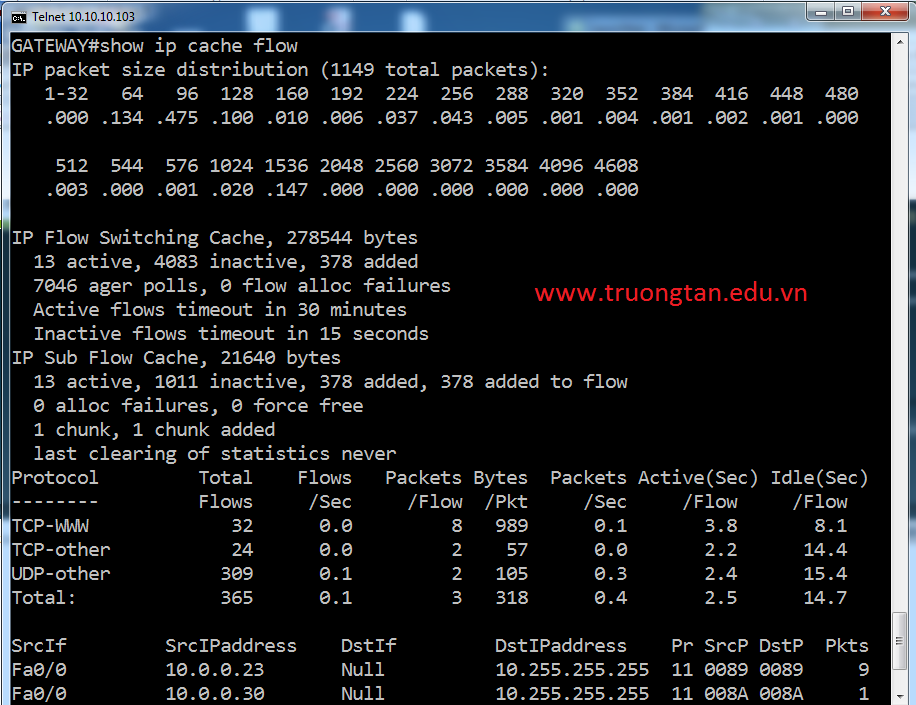
Kiểm tra:
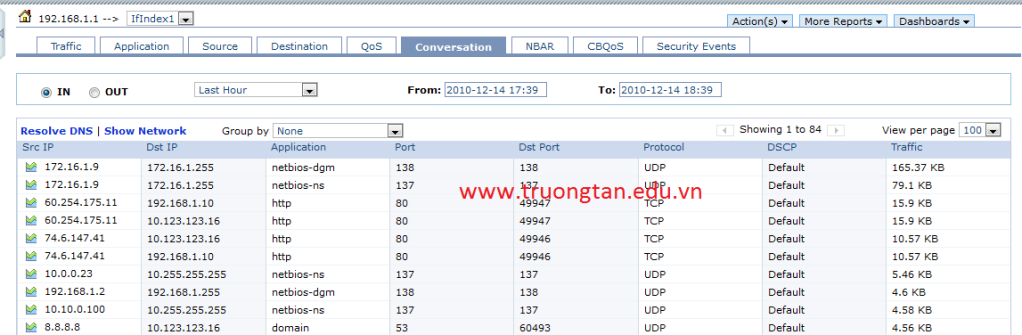
Thực hiện truy cập dịch vụ Internet từ PC, ta có thể phân tích lưu lượng của ứng dụng theo kích cỡ gói, số lượng gói, địa chỉ IP, số port, cổng vào, cổng ra… trên router bằng câu lệnh show ip cache flow
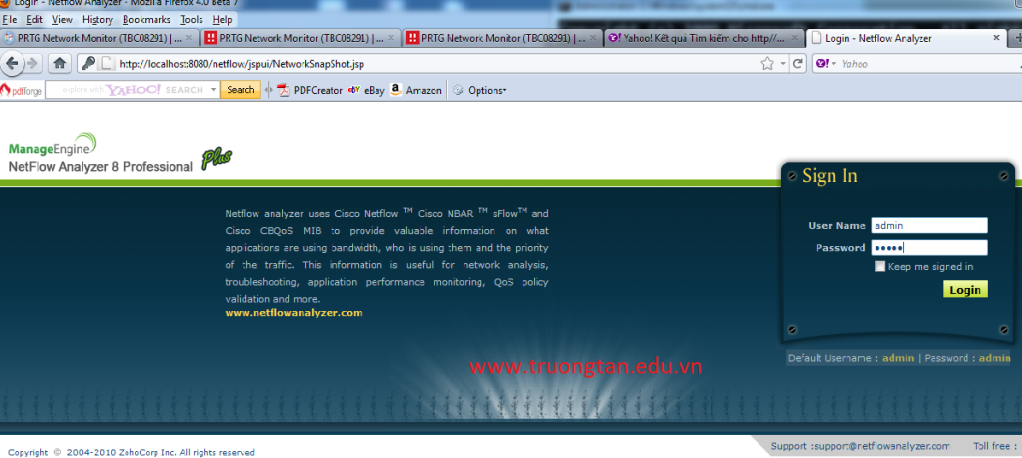
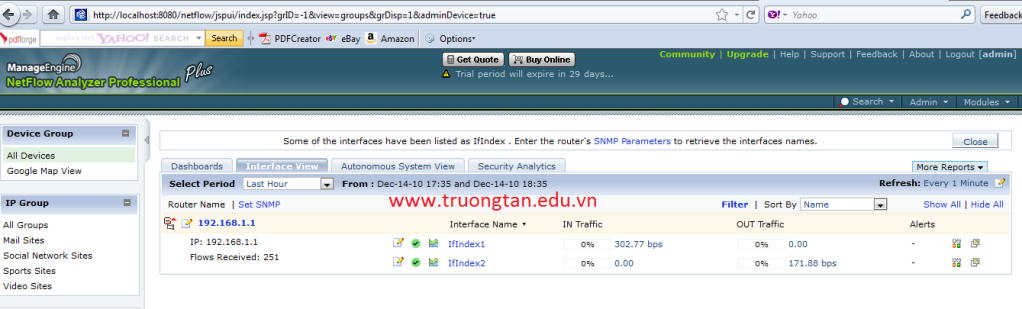
Bạn có thể quan sát trực quan bằng công cụ phân tích netflow dựa trên giao diện Web. Thực hiện đăng nhập vào ứng dụng với User Name :admin, Password : admin
Sau khi đăng nhập thành công, bạn sẽ thấy các thiết bị được theo dõi:
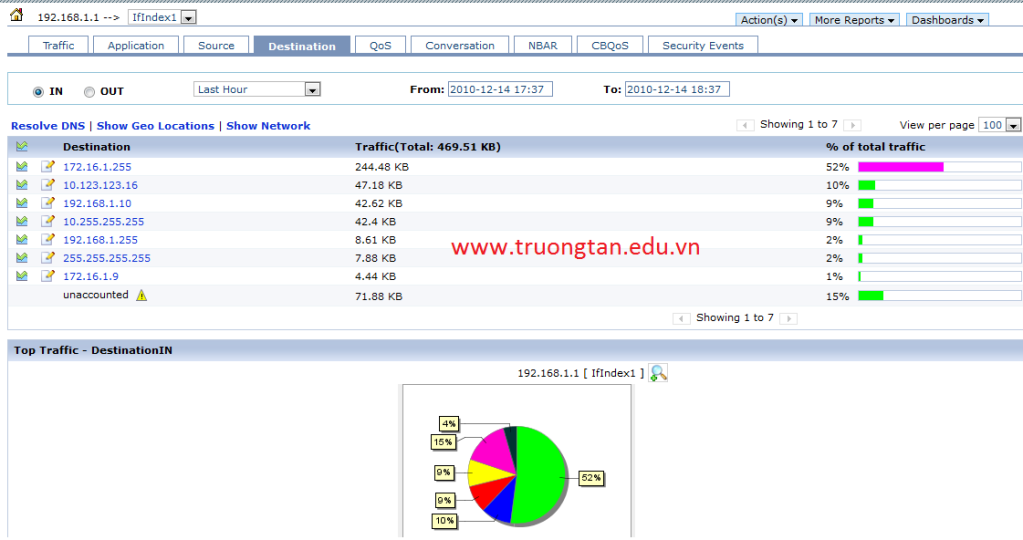
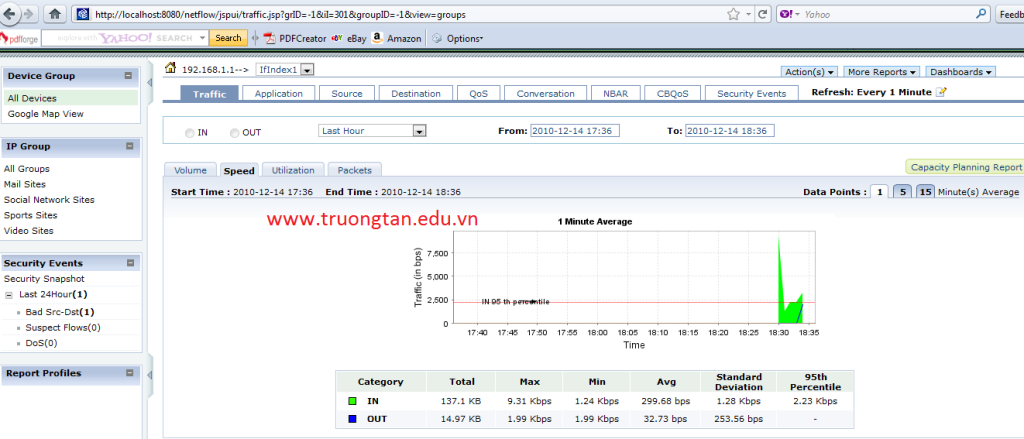
Biểu đồ biểu hiện lưu lượng theo thời gian và bảng thể hiện lưu lượng theo ứng dụng
Phân loại lưu lượng theo địa chỉ IP nguồn và IP đích